- Introduction
- But what does that mean?
- The math behind it
- In practice
- To sum it up,
- Additional Resources
Introduction
Welcome to the first blog of this tiny “initiative”. My name is Filip, and fxfx will be a place for me to dump my thoughts and maybe launch some of my side projects that I’ve been working on.
In this one, I will write about quantization, which is the process of reducing a model’s numeric precision.
Quantization works by casting the model’s weights to a smaller type, usually INT8 or FP16. In general, you should choose the right type for your use case, depending on what your GPU can handle.
Why would you use it?
- Running models on mobile devices
- Running larger models in general
- Inference speed and memory usage
But what does that mean?
It’s all about compression!
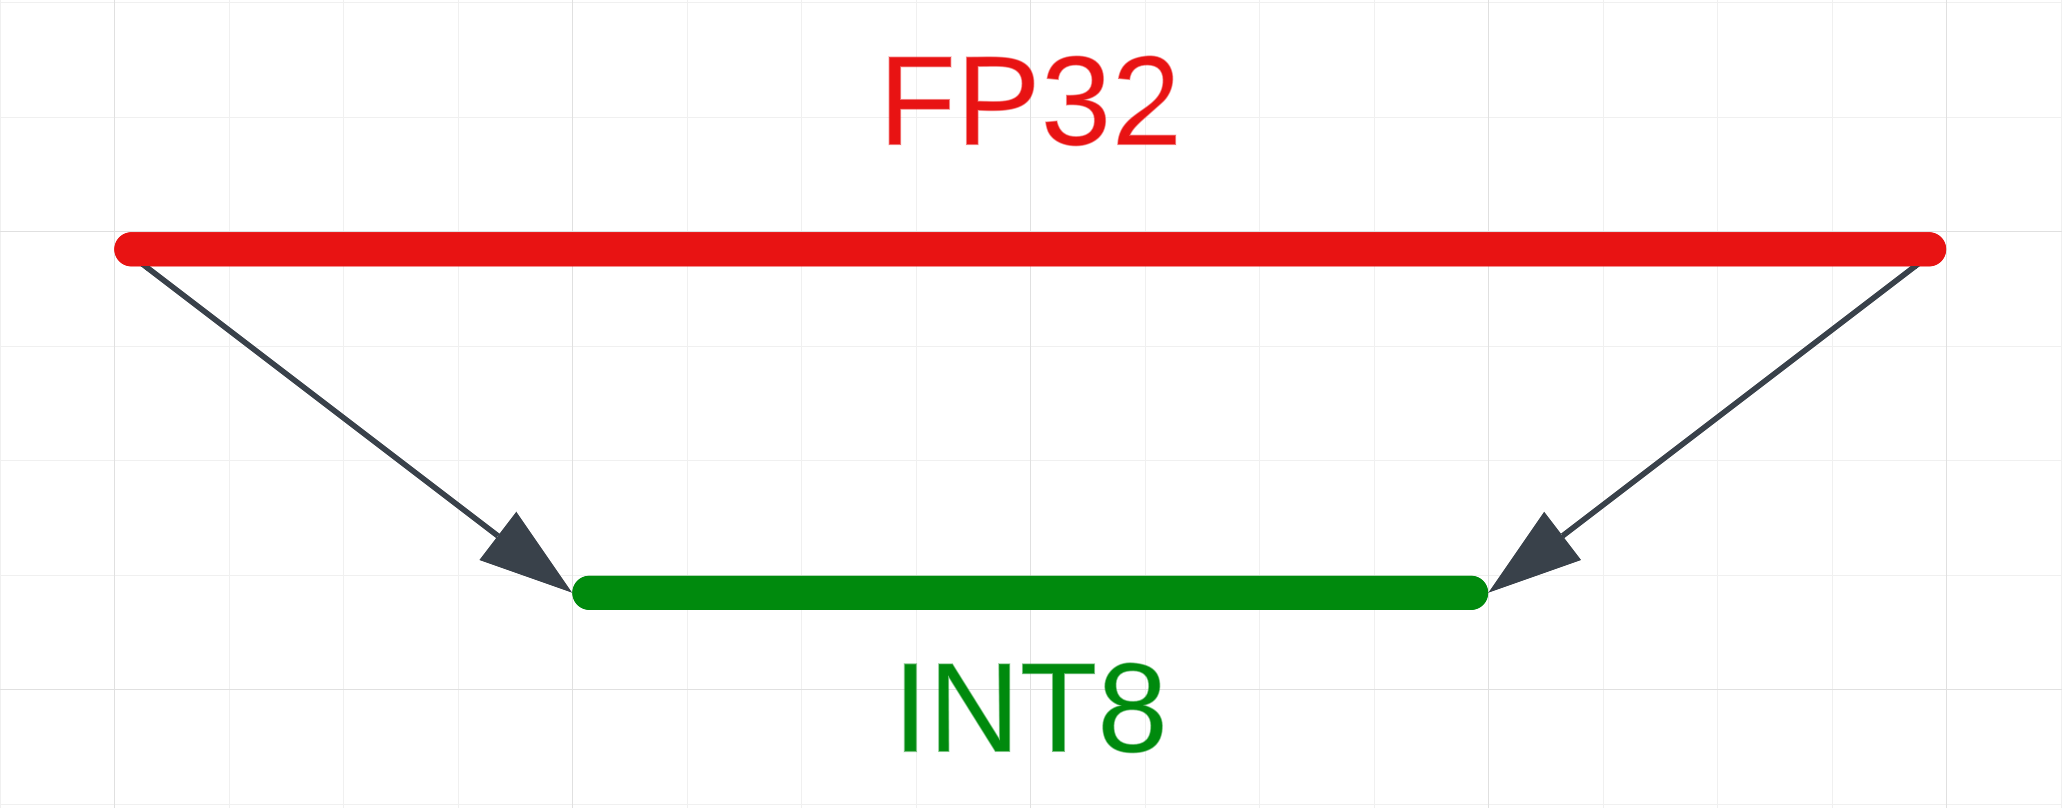
Deep learning models work with weights — tensors consisting of floating-point numbers. LLMs are usually trained in FP32 (32-bit floating point) format. This format offers a lot of precision, allowing values between -2,147,483,648 and 2,147,483,647 — quite a large range! (It’s important to note that these numbers can be negative.)
Even though computers are generally better at math than humans, they still have a hard time with large numbers. To make it easier for them, we can approximate the numbers. For example, by rounding to INT8 (8-bit integer) format, we limit the range to -128 to 127.
The math behind it
How does this work mathematically? It’s actually a very simple process!
The equation is:
x_q = round(x/scale + z)
where x_q is the quantized value, x is the original value, scale is the scale factor, z is the zero point.
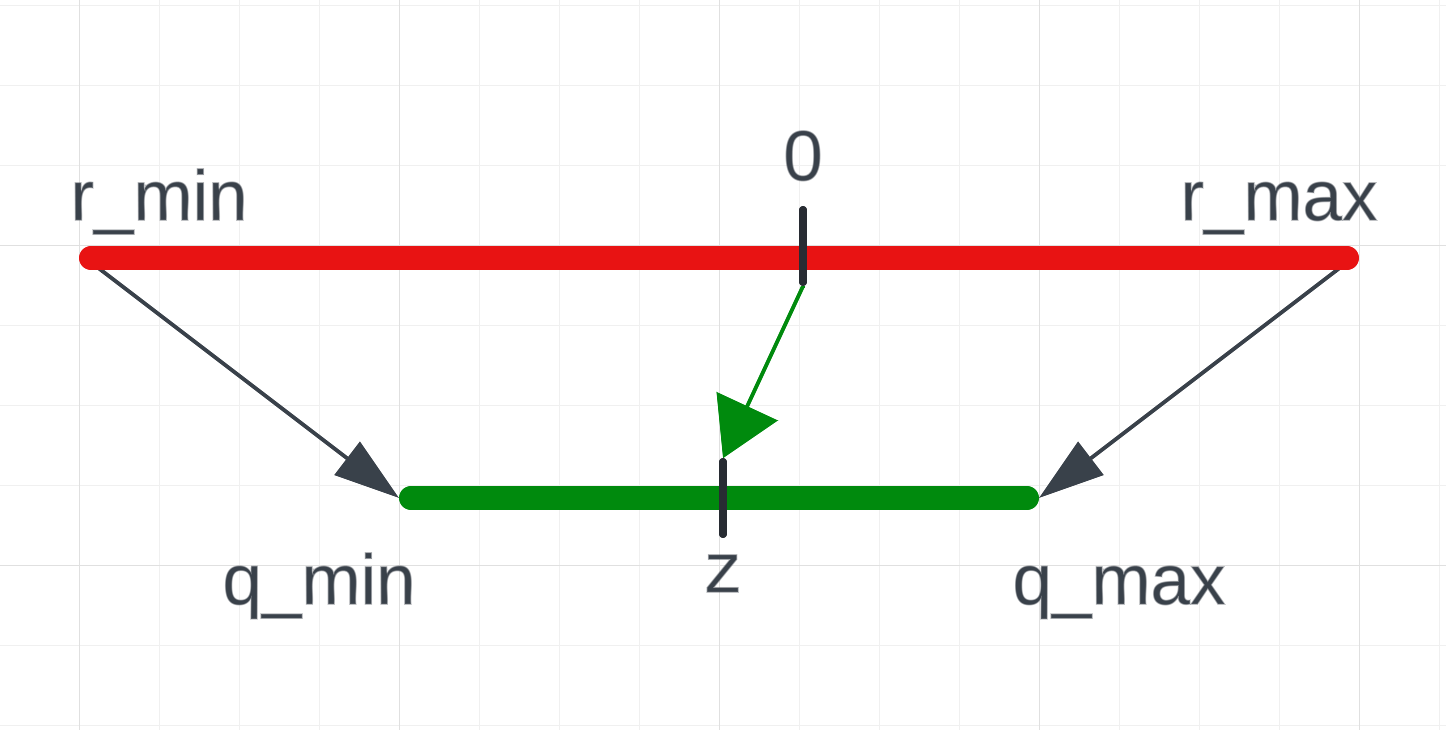
Here you can see some added annotations, let’s exchange them with our numbers
From high
We need the r_min and r_max values to know the range of the input values of the original tensor.
r_min is the lowest value of the original tensor. r_max is the highest value of the original tensor.
import torch
# Create our tensor
tensor = torch.tensor([[-2.58963, -0.6127],
                      [0.7035, 1.1729]])

r_min = tensor.min().item()
r_max = tensor.max().item()

# r_min == -2.589629888534546
# r_max == 1.1728999614715576
That’s all we need from the original tensor!
To low
Here, we will need the q_min and q_max which are the range of the desired type. Additionally, we will need the scale and z -> zero_point values.
q_min is the lowest value of the type, while q_max is the highest value.
# torch.iinfo stores information about types
q_min = torch.iinfo(torch.int8).min
q_max = torch.iinfo(torch.int8).max

# q_min == -128
# q_max == 127
scale is the scale factor, this will let us dequantize it later on.
scale = (r_max - r_min) / (q_max - q_min)
# scale == tensor(0.0148)
The last thing we need is the z -> zero_point. This maps the original 0 to the quantized zero point.
# The zero point will be an n-bit integer, so we round it and then cast it
# This is the zero point of the INT8 type
z = int(round(q_min - r_min / scale))
# z == 48
Quantization
We have all the information we need to quantize our tensors!
# Quantize the tensor
quantized_tensor = torch.round(tensor / scale + z)

# Now, we need to clamp it between the range of the type and cast it
quantized_tensor = quantized_tensor.clamp(q_min, q_max).to(torch.int8)
# quantized_tensor == tensor([[-128,    6],
#                            [  96,  127]], dtype=torch.int8)
We can dequantize it back to the original tensor:
# Dequantize the tensor
dequantized_tensor = (quantized_tensor.float() - z) * scale
# dequantized_tensor == tensor([[-2.5969, -0.6197],
#                              [ 0.7082,  1.1656]])
We lost some precision during the dequantization process, this is one of the tradeoffs of quantization.
# Original tensor
[[-2.58963, -0.6127],
[0.7035, 1.1729]]

# Quantized tensor
[[-128,    6],
[  96,  127]]

# Dequantized tensor
[[-2.5969, -0.6197],
[ 0.7082,  1.1656]]
In practice
Transformers
When working with LLMs, you’ll most likely encounter q
bitsandbytes works directly with transformers, it’s used for 4-bit or 8-bit quantization.
import torch
from transformers import BitsAndBytesConfig
from transformers import AutoModelForCausalLM

config = BitsAndBytesConfig(
    load_in_4bit=True,
    bnb_4bit_quant_type="nf4",
    bnb_4bit_use_double_quant=True,
    bnb_4bit_compute_dtype=torch.bfloat16,
)

model = AutoModelForCausalLM.from_pretrained("mistralai/Mistral-7B-v0.1", quantization_config=config)
Want to go more in-depth? Check out the official docs
Hugging Face Models
When browsing the Hugging Face hub, you might see a -GGUF in names of some models.
(TheBloke is responsible for a lot of them)
When you see it, or a few other ones like GPTQ or AWQ you’ll know that the weights are already quantized.
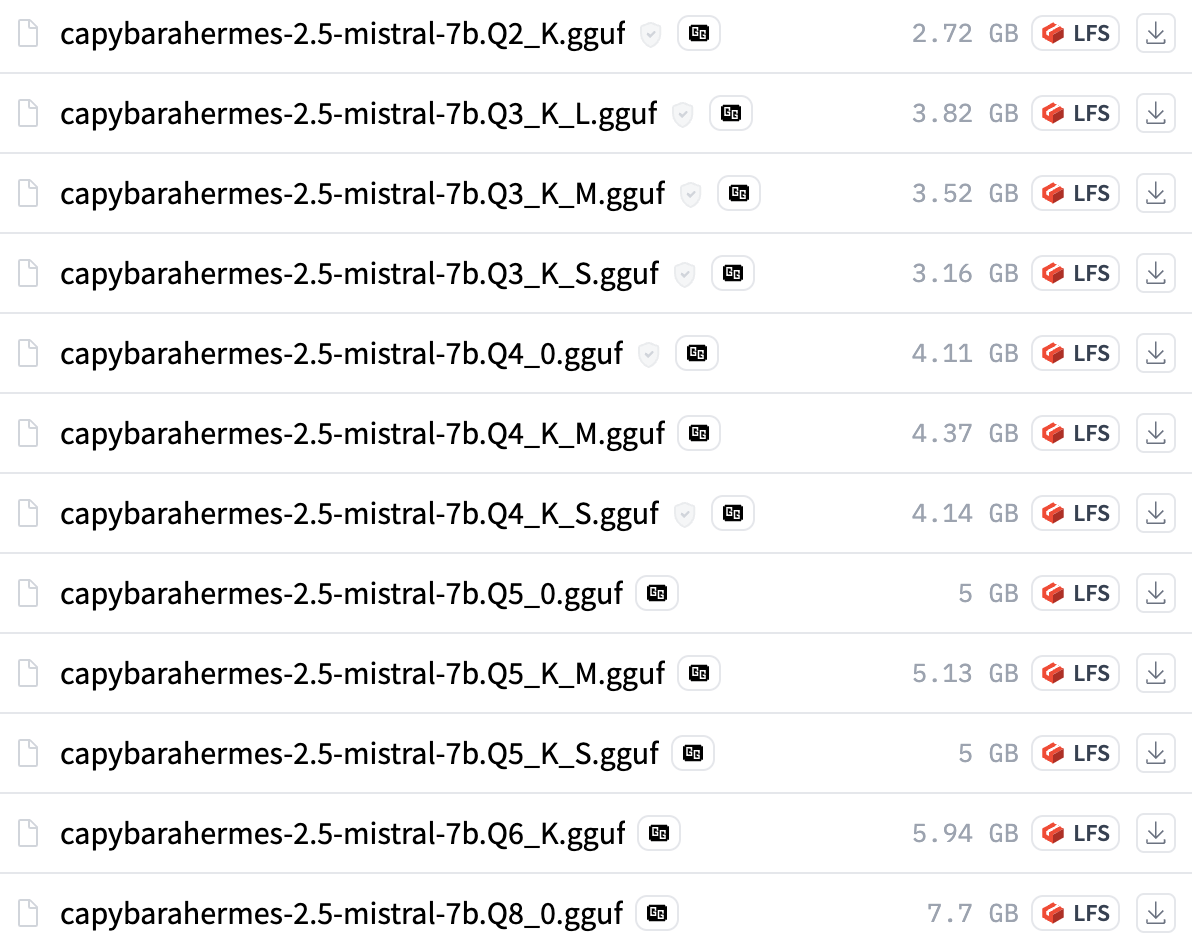
The last part with the Qs is the most important.
Let’s look at capybarahermes-2.5-mistral-7b.Q4_K_M.gguf
Q-> Indicates that the model is quantized4-> 4-bit quantizationK-> Representskquants, bits are allocated in a smarter way than legacy quantsM-> Refers to the mix of quantization types, some layers are more important -> give them more bits per weight
Legacy quants will have a 0 or a 1 in place of the K.
The general rule of thumb is to look for quants above Q3 that have K in the name (There’s also new I-quants, read more about it in the references!)
- Really good resource for how each quantization tier impacts the model
- Overview of quant methods (Legacy, K, I)
To sum it up,
Quantization is a powerful technique that can help reduce the memory and computational requirements of large models. If you’ve been playing around with demos on Google Colab, you probably already encountered this and saw how impactful it can be.
Use it when you have limited compute and you’re willing to sacrifice some accuracy for speed.
Thank you for reading!